Technical FAQ
What is the difference in ‘grout included’ and ‘grout ignored’ values?
When the grout is ignored: the f’m, hollow is always used in the engineering calculations (independent of where the compression zone is located). When grout is included, f’m,hollow is used when the compression zone (β1c) is within the faceshell, and f’m,grouted is used when the compression zone is outside of the faceshell. In practice, adding grout does not reduce the moment capacity of the wall, hence, it is permissible to ignore the effect of grout if it is advantageous. To ensure that the addition of grout does not reduce the capacity of a wall, a comparison between the moment resistances when excluding the grout and including the grout is performed. The largest resulting moment is chosen.
The program was not able to provide a successful design. Why?
A particular design can be unsuccessful for several reasons:
- The program has run out of iteration possibilities. The loads applied onto the assemblage are too high, and there is no combination of masonry unit sizes, strengths, and steel choices that would provide a successful design
- The CSA standards are not met. For instance, an out-of-plane wall can instantly fail if the axial load applied is greater than Pr,max
- The user has limited the program’s design options by de-selecting too many masonry unit or reinforcement choices. Checking-on ALL the masonry unit size, strength, and reinforcement configuration selections may provide a successful design
Under the Simplified Results tab the program provides the user with the reason for an unsuccessful design.
What is the Transition Zone?
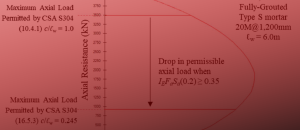
For out-of-plane reinforced walls, the P-M diagram is determined by varying the length of the neutral axis, c, and establishing the corresponding axial resistance and moment resistance of the wall. For reinforced walls, when the neutral axis depth extends the location of the steel, the steel is no longer in tension and the wall can be treated as an unreinforced wall. The resistance of the wall may change considerably because of the effective compression length.
The effective compression length beff is the length of the wall that acts with a single reinforcing bar (for walls under minor axis bending), adjusted to a per meter length. It varies depending on if the wall is reinforced, the reinforcement spacing, and the bond pattern (running bond, or stack bond). If the wall is unreinforced, or if it is reinforced but the bars are in compression, the effective compressive length is equal to 1000 mm. Otherwise, the length is reduced according to CSA S304.1-04: 10.6.1. Because beff may change in value when the wall jumps from being reinforced to being treated as unreinforced (when the reinforcing steel is in compression), a considerable discontinuity may occur in the P-M diagram. Within the program, this discontinuity is deemed the transition zone.
In order to create a smoother transition in the P-M diagram, while maintaining a conservative design, the program takes special design considerations depending on the circumstance in which the transition zone is encountered. For larger reinforcement spacings, the transition zone becomes more prominent, because of how the compression zone length is calculated. For spacings smaller or equal to four times the actual thickness of the block the compression zone length remains at 1000 mm, and therefore there is no noticeable transition zone.
Most P-M Diagrams seen in literature make the assumption that the compression zone length is kept steady at beff =1000 mm. By introducing the transition zone within the program, these assumptions are not necessary, and it is possible to draw a wider range of P-M Diagrams.
What purpose does the safety factor serve?
MASS utilizes an additional safety factor, φlinear , to help in obtaining an unreinforced wall design that remains conservative. This factor aids in ensuring the linear behaviour of the uncracked wall under compressive stresses. Currently the program utilizes φlinear=0.5. This is chosen based on the fact that the modulus of elasticity remains linear between 5 to 33% of the compressive strength.
What function does the ‘smear design’ checkbox have?
The ‘smear design’ checkbox allows users to smear the grout in a partially grouted web of the shear wall. This is, rather than treating each cell in the web discretely, an average weighted strength can be determined, and applied to the length of the web. The weighted average compressive strength (effective compressive strength, f’m, eff) is determined by averaging the compressive strengths of the grouted cells, f’m, grouted , and the ungrouted cells, f’m, hollow . With the ‘smear grout’ capability, designers can readily compare quick hand-calculations with the calculations obtained by the program. Since however, treating each cell individually provides a more accurate solution, MASS also allows each cell to be treated individually in order to obtain the more accurate solution. Both modes provide similar answers.
What is an end zone?
For partially grouted walls, it is possible to simultaneously apply smearing effects and concentrate the amount of steel placed in the web towards the ends. This typically results in several grouted cells towards the ends of the web. Smearing the grout in these cells with the cells in the centre of the web may result in a smaller calculated moment resistance. To take full advantage of the grout at the ends, the web is divided into three segments: the smeared segment and the two ends. The program refers to these two ends as end zones. Within the engineering calculations, an end zone is defined by the number of consecutively cells at either end of the web, and is terminated at an empty cell.
Why are the vertical steel bars not centred in the cells in the cross-sectional view of the wall and shear wall drawings?
These drawings accurately portray the reality of placing vertical steel bars within a cell. The cells in a running bond arrangement do not perfectly align with one another. This creates an overlap and shifts the location of the bar from the centre of the cell.
The ‘Vertical Steel’ box has been greyed out. Why does the program not allow for the placement of stirrups?
The program is designed to adjust/update the Materials tab depending on the design parameters specified by the user. In this case, the ‘Vertical Steel’ box is triggered by Clause 11.3.4.8. According to CSA S304.1: 11.3.4.8, the maximum spacing of stirrups allowed is the lesser of 600 mm or d/2; where, d is the distance to the centroid of the tension steel bars from the extreme compression face.
In cases where d/2 < 200mm there is no satisfactory stirrup spacing.
Why does the program allow users to enter a grout strength?
Currently this grout strength is not used by the program, but has been included for use in future upgrades.
How do I apply loads in the wall module?
To simplify the design procedure, the program designs a wall with a representative design length of 1000 mm. This design length is shown in the wall drawing using blue shading. This is a common practice among designers. A length of 3200 mm is automatically entered into this program, for illustrative purposes only. With this length it is possible to illustrate the design length (1000 mm), and the maximum moment steel spacing of 2400 mm (CSAS304.1: 10.15.1.2) comfortably in that space. All dimensions in the program are entered in millimetres. Loads are assumed to be applied over the 1 meter strip, not over the illustrative length of 3.2 meters. For example, a 10 kN/m uniformly distributed load would be entered as (10 kN/m) × 1 m =10 kN axial load.
I noticed that I can enter top and bottom steel but the program automatically adds intermediate steel that I do not want – I am assessing an existing assemblage. There is no box to modify this intermediate steel that I can see.
The user can modify where the intermediate steel is placed (with respect to the bottom of the beam) using the ‘Bottom Steel’ tab, in the ‘Minimum Clearances’ box. However, the placement of the steel is governed by CSA S304.1-04 Clause 11.2.6.3, so depending on the particular beam it may be necessary.
What is the difference between the height and the total height in the shear wall module?
The distinction between the height and total height is there to address a concern related to squat shear walls. For example, if the user is designing a multi storey shear wall that is 12 m high (3 storeys) and 8 m long it is not considered to be a squat shear wall. However, when designing each storey (4 m x 8 m) the program will return a design treating the wall as a squat shear wall when it is not (12 m x 8 m overall). The “Total Height of Wall” input would be the input used for the squat shear wall check, with the “Height” input being used for drawing/design.


