

Activation for Older Versions (v2.2.1)
Note that this is the old process and all current users should refer to the main activation page here.
If using an old version, follow the steps below:
Locate the MASS™ icon on the desktop and double-click the icon. This opens the MASS™ welcome screen, as shown in
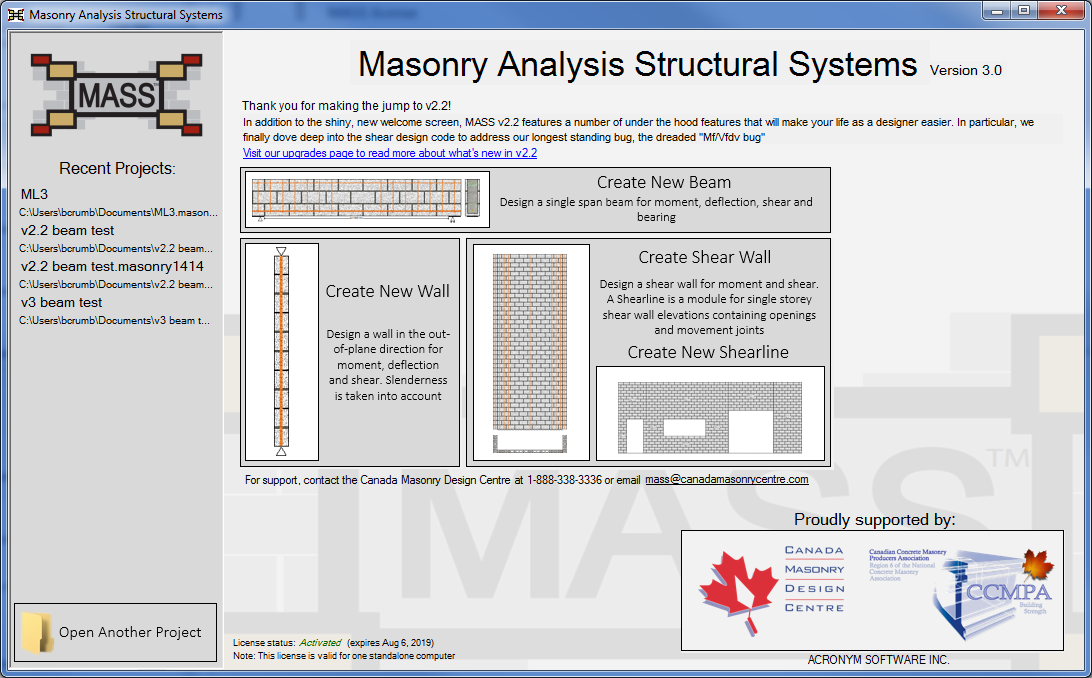
Figure 1‑13: MASS™ Welcome Screen
- To begin activation click on either of the 3 icons; ‘CREATE NEW BEAM’, ‘CREATE NEW WALL’, or ‘CREATE NEW SHEAR WALL’. This will open the activation screen as shown in
- In the first row, enter in the ‘Serial number’. The serial number can be found on the back of the MASS™ DVD package. (Note that if the license has been renewed, the serial number can be found on your online dashboard on the MASS website)
- When the serial number is entered correctly, it will be displayed in green, as shown in
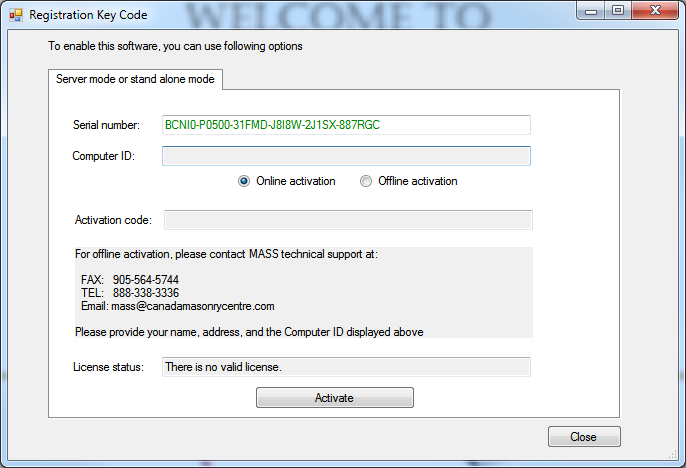
Figure 1‑14: Registration of License (Activation Screen)
- There are two ways in which a user can activate MASS™: online activation and offline activation.
- For online activation, the user must be connected to the internet. To perform an online activation, select ‘Online activation’ as shown above in
- For offline activation, select ‘Offline activation’ (shown below in
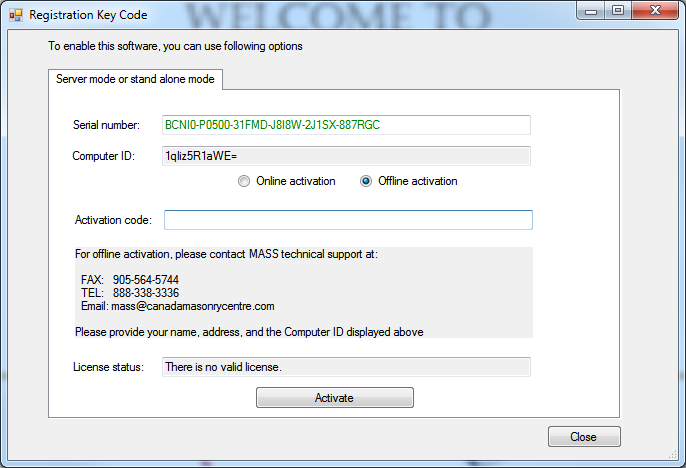
Figure 1‑15: Offline Activation
- After a successful activation the ‘License status’ field will change from ‘There is no valid license’ to ‘License will expire on XXXXX’, where XXXXX is the expiration date of the license (See
- To complete the activation procedure, click ‘Close’.
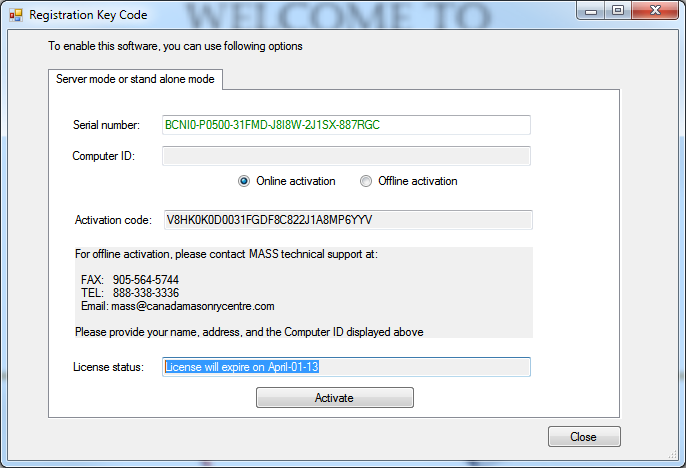
Figure 1‑16: Successful Activation
Was this post helpful?
Let us know if you liked the post. That’s the only way we can improve.